)
Introduction
In the world of OpenStack, managing shared storage across multiple instances has traditionally been a complex hurdle. While block storage is common, many enterprise workloads—from CI/CD pipelines to legacy app migrations—require a true Shared File System.
This is where Manila shines, providing a scalable service for mounting the same storage across various compute resources. However, in a modern DevOps environment, manual provisioning is no longer an option. To ensure security, consistency, and speed, teams must treat their shared filesystems as code.
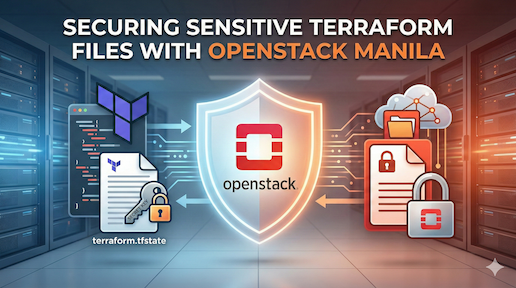
In this guide, we will explore how to bridge the gap between OpenStack Manila and Terraform. We’ll dive into the architecture of secure share networks and demonstrate how to automate the deployment of shared files, ensuring your infrastructure is both robust and reproducible.
What is OpenStack Manila?
OpenStack Manila is the Shared File Systems service designed to provide “File Storage as a Service.” Unlike block storage (Cinder), which connects a virtual disk to a single instance, Manila allows multiple compute instances to mount and access the same shared filesystem simultaneously.
Think of it as a cloud-native Network Attached Storage (NAS). It abstracts various storage protocols—like NFS for Linux or CIFS/SMB for Windows—allowing DevOps teams to provision, manage, and scale shared storage through a unified API or CLI, rather than managing physical storage hardware manually.
Understanding Manila Backends
When deploying OpenStack Manila, the backend is the storage technology that actually holds and serves your data. Manila acts as an orchestration layer, translating your requests into commands that the specific storage hardware or software understands.
Common backends in production environments include:
- NetApp: Enterprise-grade storage arrays using ONTAP.
- CephFS: A distributed filesystem that integrates natively with Ceph.
- LVM: Using local Linux Logical Volume Management (common in small or test labs
Focusing on the Generic Backend :
For this demo, we are focusing on the Generic Backend (also known as the GenericShareDriver). This is arguably the most versatile backend for learning and dev/test environments because it doesn’t require expensive, proprietary storage hardware.
What is the Generic Backend?
The Generic backend works by using OpenStack Cinder (block storage) as its foundation. Instead of talking to a physical NAS, Manila:
- Spins up a small Service VM (automatically managed by Manila).
- Attaches a Cinder volume to that VM.
- Configures an NFS/CIFS server inside that VM to export the volume as a share.
Share Creation Process with the Generic Backend
When a share creation request is initiated, OpenStack Manila selects an appropriate backend (such as the Generic Driver) and orchestrates the creation of the required resources.
First, OpenStack Neutron creates a dedicated network port for the NFS server. Then, OpenStack Nova launches a virtual machine configured to act as the NFS server. At the same time, OpenStack Cinder provisions a storage volume and attaches it to the VM.
Manila automatically mounts the volume on the NFS server, which then exports the share to clients over the dedicated network. Clients can subsequently mount the share and collaborate on files within the OpenStack environment.
The Generic backend of OpenStack Manila, particularly suited for testing or demonstration environments, automates the creation of file servers as virtual machine instances, without requiring a dedicated storage solution or a complex distributed file system. Integrated through Kolla-Ansible, this backend operates in DHSS mode (Driver Handles Share Servers), where each share is served by a dedicated VM. OpenStack Cinder provides the storage volumes, OpenStack Nova handles instance deployment, and OpenStack Neutron ensures network connectivity.
Before provisioning file shares with this backend, it is mandatory to create a volume through the Cinder service. The Generic backend relies on Cinder volumes to store the file systems that will be exported as shares. In this implementation, the LVM backend is used to quickly provide persistent volumes from a dedicated local volume group. Once the volume is created, it is automatically attached to a Nova instance deployed by Manila, which configures it as an NFS or CIFS file server. This mechanism strengthens the integration between Cinder and Manila, ensuring automated file share management within the OpenStack infrastructure.
To better illustrate the integration of the Generic backend with Manila, we designed an architecture that presents the complete workflow for creating and managing file shares – from the user request to the share being made available through the dedicated file server.

Create a manila Share file
Before proceeding with the creation of a Manila share using the generic backend, it is essential to ensure that the Manila services are running properly and that all the necessary technical prerequisites have been prepared.
As you can see, the manila-share service is correctly associated with the generic backend, which indicates that the Manila file share service will use this backend to store the shared files.
1- Creation of a Specific Flavor
Define a flavor with ID 100 for the NFS servers managed by Manila. This profile should include resources that are suitable for handling file shares.
nova flavor-create manila-service-flavor 100 128 0 1
2- Share Type Configuration
Create a default share type with the DHSS (Driver Handles Share Servers) option enabled. This feature allows Manila to automatically manage the NFS servers.
manila type-create default_share_type True
3- Shared Network Configuration
Configure a shared network in OpenStack Neutron, ensuring proper connectivity between the instances and the storage services.

4- Creation of the Manila Share
Once these steps have been validated, we can now create our Manila share:
manila create NFS 2 --name share-terraform --share-network demo-share-network1
5- Access Authorization
For the access rule, we will allow the OpenStack instance named “terraform-instance” to access the share via its IP address.

After the share is created, a share server will be automatically provisioned, and the share will be hosted on this share server (an OpenStack instance).

6- Store the critical Terraform file (terraform.tfstate) in the share.
Mount the share from an instance : Get export location from share

After creating a share with Manila, it is possible to mount it from an instance. To do this, you first need to retrieve the export location of the share using the following command:
From the virtual machine “terraform-instance”, you can create a local directory to serve as the mount point.
To do this, start by connecting to the instance and creating the mount directory, then mount the NFS share using the following command:
mount -t nfs 10.254.0.3:/shares/share-422dc546-8f37-472b-ac3c-d23fe410d1b6 /mnt/terraform-state
After mounting the share, our Terraform instance has been set up, and we also created a small Terraform project. In this project, the terraform.tfstate file is stored on the Manila share.


With this mount, the terraform.tfstate file will be accessible only to the instances that have permission to access the share, and it will be shared among those authorized instances.

- Deploying Shared Files in OpenStack: A Guide to Manila Security and Terraform Integration - March 4, 2026
- Integration of the Octavia module (Load Balancer as a Service) in an OpenStack Cloud Environment – Part 2 - December 7, 2025
- Integration of the Octavia module (Load Balancer as a Service) in an OpenStack cloud environment – Part 1 - December 7, 2025